4Video DVD Creator is not only a professional DVD burning tool but also easy-to-use software for users. Apart from DVD burning, it can also create DVD Folders or ISO files. In addition, this software can realize the perfect conversion from the most popular video formats including TS, MTS, M2TS, DV, DivX, XviD, MPEG, MP4, WMV to DVD at ideal speed. So it is convenient to save your favorite videos/movies and you can enjoy them on DVD player anytime.
With this DVD creator, you can adjust the video effect, crop the video screen, trim the video, and add watermark to personalize your DVD. Apart from these fundamental editing functions, this professional tool provides the powerful function of adding and editing audio tracks and subtitles, even creating opening film and editing DVD menu with customized background picture/music.
Processor: Intel® processor and M1&M2 chip
OS Supported: Mac OS X 10.5 or above
Hardware Requirements: 512MB RAM, Super VGA (800×600) resolution, 16-bit graphics card or higher
Click the Edit Menu on the top right corner of the Menu panel to open the Edit Menu window. Click the drop-down button on the top left of the dialog, there are four items: Menu, Frame, Button, and Text.
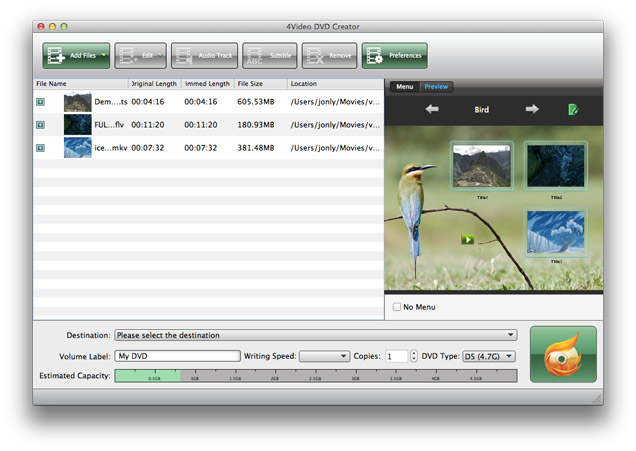
Menu: As shown in the picture above, on the left field of the Menu Dialog, there are various menu templates to satisfy your need, double click anyone you like, and it will be displayed in the right preview area.
Frame: You can select different styles of frames for the DVD menu. Click one frame in the preview area, then double click one from the templates in the left part and the effect can be viewed in the right preview area.
Button: You can select one from various buttons for the DVD menu. Click one button in the preview area, then double click one button you like from templates and the effect can be viewed in the right preview area.
Text: You can also set the titles for menu.
Choose one title in the preview area, and enter text to rename the title in the textbox beside the Text Content.
Click Font to open the font window to edit the font of text, and click Color to open the color window to choose a font color.
Click the up and down button or enter a natural number between 6 and 72 directly to set the size of the title.
Background Music: Check the Background Music option, and click the Browser button beside the "Background Music" field to choose the music you like as the background music of the menu.
Background Picture: Check the Background Picture option, and click the Browser button beside the "Background Picture" field to select the picture you like as the background picture of the menu.
Opening Film: Check the Opening Film option, and click the Browser button beside the "Opening Film" field, add the video you want as the opening film.
Tip: Opening film is the video that will be played firstly when playing DVD. You can choose "play menu" directly using DVD player software to skip opening film or using DVD player realize the same effect.
Menu Play Loop Duration: You can set menu play loop duration from 0 to 99s. Just click the up and down button or enter a number directly.
After finishing the settings above, click the Save button.
Tips: Click Reset button to return to the original settings of current menu page.
Click Audio Track button to open the Audio Track window, and then add or edit the audio track.
Add and Delete: Click "Add" button at the top right corner of the window to add an audio track file you want to match the video image, or click "Delete" button to delete a audio track. Please note that the audio track of original video file can't be deleted.
Up and Down: Click the Up or Down button to move the position of the selected audio track.
Language: Click the drop-down button to choose a language to sign the audio track. Please note that changing the language will not change the content of audio track.
Volume: Drag the Volume control slider to adjust the output volume of the selected audio track. Also, you can enter the percentage between 0%-200% in the volume textbox directly or adjust the volume value with the up and down button.
Latency: If there is a delay between the audio track and the image of video, you can drag the Audio Latency control slider to make the audio track sync with the image of video when playing video file. Also, you can enter the percentage in the Audio Latency textbox directly or adjust the delay value with the up and down button. Furthermore, please note that if the audio track is ahead of the image of video, adjust the delay time forward; otherwise adjust the delay time backward. The burning effect is the same with the preview effect.
Encoder: Click the Encoder drop-down button to set the audio encoder.
Bitrate: Click the Channel drop-down button to choose a channel.
Loop: When the time length of audio track is less than that of the original file, check Loop to match the audio track and the image of video file.
After the above settings, click OK to save all the parameters.
Tips:
1. Click Reset button to return to the original settings of the selected audio track.
2. If you uncheck a audio track item, the corresponding audio track will not be burned.
3. You can add eight audio tracks at most.
4. Click Up or Down button to adjust the sequence of audio tracks, and when playing DVD, the first audio track will be the default one.
5. When you change audio encoder, audio bitrate may change accordingly.
6. Only AC3 audio encoder supports 5.1 channels, and the original audio must be 5.1 channels, then you can acquired the output of 5.1 channels.
7. All the above settings are only effective to the current selected audio track.
Click Subtitle button to open the Subtitle window, and then add or set the subtitle.
Add and Delete: Click "Add" button at the top right corner of the window to add a subtitle you want to match the video image, or click "Delete" button to delete a subtitle. Please note that the subtitle of original video file can't be deleted.
Up and Down: Click the Up or Down button to move the position of the selected subtitle.
Language: Click the drop-down button to choose a language to sign the subtitle.
Position: Drag the Vertical Position control slider to adjust the position of the subtitle.
Delay: If there is a delay between the subtitle and the audio track, you can drag the Subtitle Delay control slider to make the subtitle sync with the audio track when playing video file. Also, you can enter the percentage in the Subtitle Delay textbox directly or adjust the delay value with the up and down button. In addition, please note that if the subtitle is ahead of the audio track, adjust the delay time forward; otherwise adjust the delay time backward. The burning effect is the same with the preview effect.
Font Name: Click the drop-down button to choose the font of subtitle.
Font Size: Click the drop-down button to choose the font size of subtitle.
Color: Click Color to set the color of subtitle.
After the above settings, click OK to save all the parameters.
Tips:
1. Click Reset button to return to the original settings of the selected subtitle.
2. You can add 32 subtitles at most.
3. If you uncheck a subtitle item, the corresponding subtitle will not be burned.
4. All the above settings are only effective to the current selected subtitle.
Choose a video file in the file list, and click Edit button on the toolbar to enter Edit window. Then click the corresponding buttons of Effect, Trim, Crop and Watermark to set edit the video file.
Effect: Drag the slider bar or enter the value to set the Brightness, Contrast, Saturation, Hue and Volume. Also, you can click the up or down arrow to set them. After finishing settings, click OK.
Trim: Drag the Start Point scissors to mark the beginning of the segment, and drag the End Point scissors to mark the end of the segment. Or you can press the Mark In button to mark the beginning of your clip and Mark Out button to mark the end of your clip during the preview. Also you can click the up or down arrow or enter the value of number to set the Start Time, End Time and Length.
Crop: Click Crop button to open the Crop window to customize the video screen size. While check Keep Aspect Ratio, you can crop video under the condition of Keep Aspect Ratio as Original, Crop Area, 16:9 or 4:3. Adjust the crop frame or set the crop values to crop the video. You can set the zoom mode as Letterbox, Pan & Scan, Medium and Full.
Watermark: Click Watermark button in the Edit window to add the text or image watermark on the video screen. There are two types of watermark: Text and Image. You can define the color and size of the Text watermark. And the position and transparency of the watermark is adjustable.
If you have any questions, please do not hesitate to contact us through our e-mail: macsupport@4videosoft.com
User Help


