Introduction
As the most professional and comprehensive DVD ripper tool, 4Video DVD Manager enables users to convert homemade DVD videos to 2D and 3D video files with super fast speed and excellent quality. Most popular video formats are supported, including MOV, MP4, AVI, WMV, M4V, FLV and so on. Besides its ripping function, you can also trim and crop video with its powerful editing features. You are able to optimize the output video according to your need, like selecting the subtitle and audio track for the output video.
System Requirements
OS Supported: Mac OS X 10.7 or above (macOS Sonoma)
Processor: Intel® processor and M1&M2 chip
RAM: 512MB RAM, Super VGA (800×600) resolution, 16-bit graphics card or higher
Installation
Follow the steps below to install DVD Manager:
Step 1: Download DVD Manager installation file.
Step 2: Double click the downloaded installation file to start installation.
Step 3: Follow the instructions to finish the installation.
How to & Troubleshooting
How to add and convert DVD file
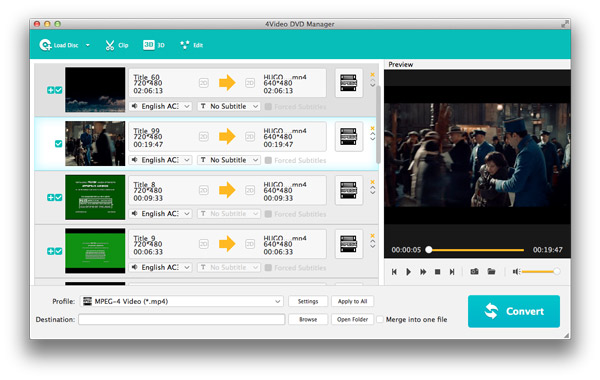
Insert homemade DVD disc to your Mac and wait the computer to recognize your disc. Then launch 4Video DVD Manager.
Step 1. Click the "Load Disc" button from the top menu of the program to load the target DVD video.
Step 2. Hit the "Profile" box and choose your preferred video format to rip, including MOV, MP4, FLV, AVI and so on.
Step 3. Finally, click the "Convert" button on the bottom-right corner to rip your homemade DVD.
DVD Manager allows you to crop the input DVD video, so that you can choose the preferred video part and remove the rest you don't need.
Step 1. Highlight the target DVD video, and then click the "Clip" button to enter the pop-up "Clip" window.
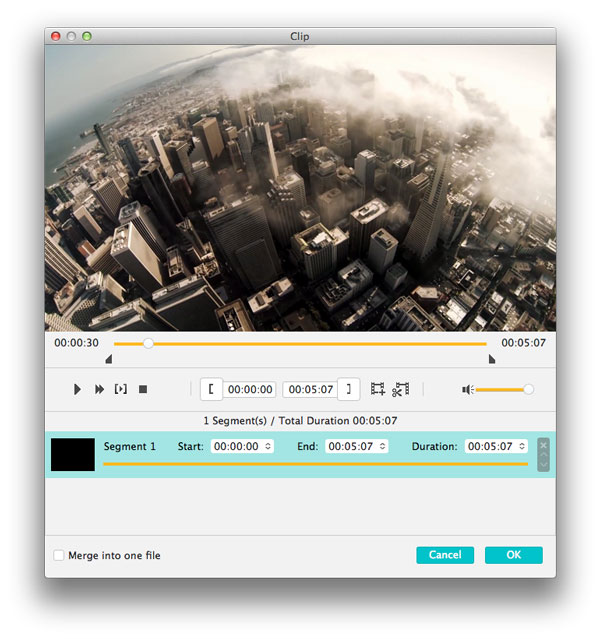
Step 2. You are able to preview the video file while cropping it. Set the start and the end time or toggle the sliding button to make video segment and remove the unnecessary part.
Step 3. Check the bottom-left box if you want to merge more than one video clip into one file. Finally, click "OK" to shut down the window.
4Video DVD Manager has the capability to help you convert any homemade DVD movies to 3D with ease, so that you can enjoy the output 3D video file with 3D TV or any other compatible 3D devices. Two 3D effect options are available, including anaglyph and split screen.
Step 1. Target the DVD video, and choose the "3D" button from the top menu.
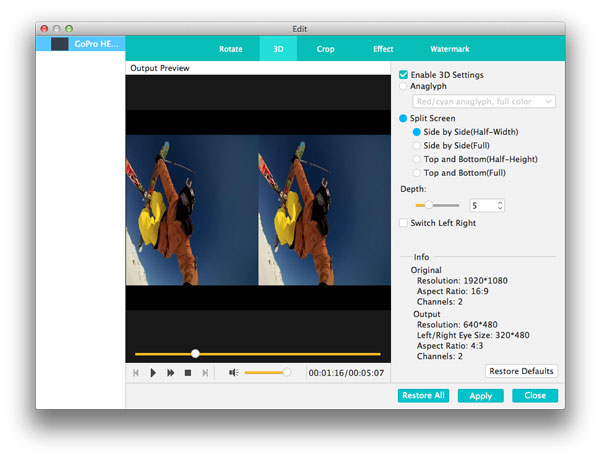
Step 2. In the pop-up "Edit" window, you can add 3D effect as you like. Check the box of "Enable 3D Settings" and choose preferred 3D mode according to your need. At last, click "Apple" and then "Close" to close the window.
How to rotate/crop video, adjust video effect, add watermark
DVD Manager provides powerful editing features, so that you can rotate, crop video, add personalized watermark as well as adjust video effect. Choose the target video file, and click "Edit" to edit video.
Rotate
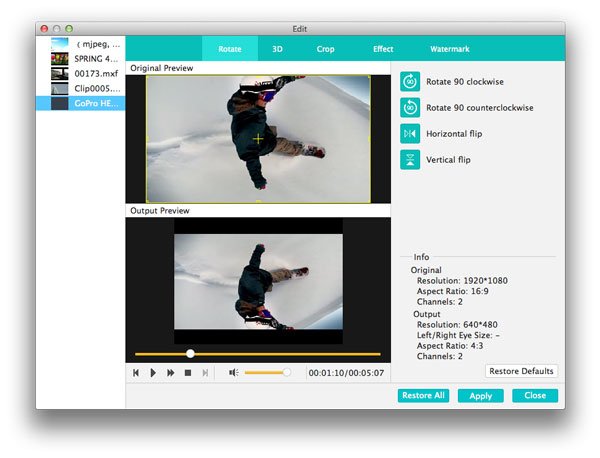
Rotate video 90 degree clockwise, 90 degree counterclockwise and so on.
Crop
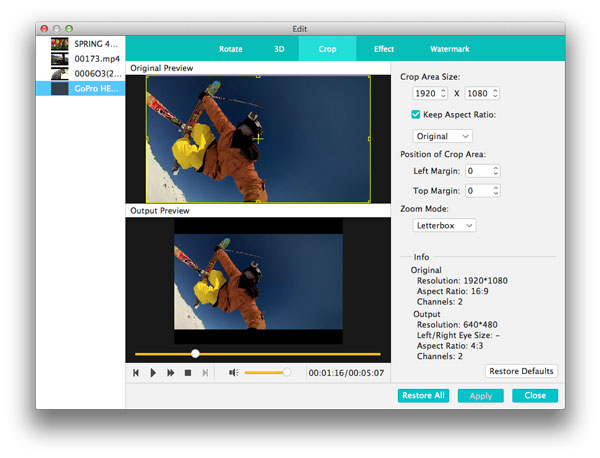
Crop video area to get rid of the black edges to suit screen.
Effect
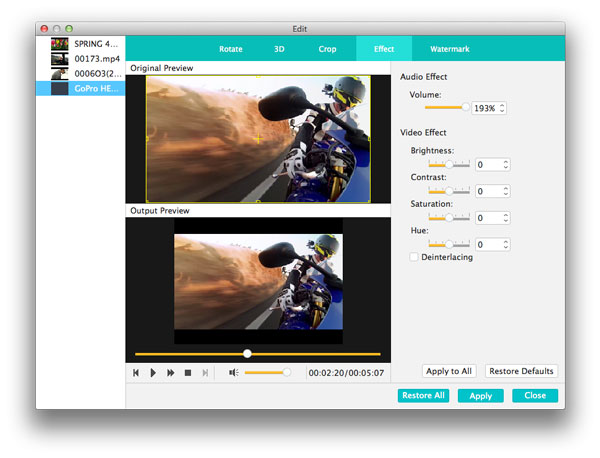
Adjust audio volume and set the video brightness, contrast, saturation and hue.
Watermark
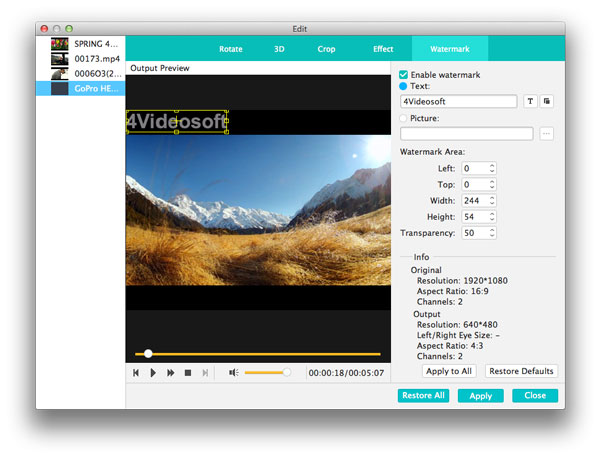
Add personal text or picture to the video and adjust watermark area.
Use the "Shift" or "Command" key to select more than one DVD video that you want to merge, and then check the box of "Merge into one file". Finally, click "Convert" button. After that, these selected DVD video files will be combined into one file.How to Adjust Profile Settings
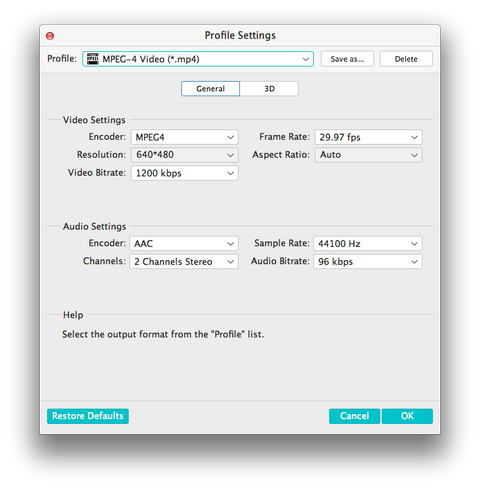
Click "Settings" button to open the "Settings" window.
You can select "Encoder", "Frame Rate", "Resolution", "Aspect Ratio" and "Video Bitrate" to set video and select "Encoder", "Channels", "Audio Bitrate" and "Sample Rate" to set audio. Also you can preset the 3D settings for the output 3D video.
User Support
If you have any questions, please do not hesitate to contact us through our e-mail: support@4videosoft.com
User Help


